contentGATE - we migrate, you enjoy "the ride“
Our solution, contentGATE, manages data transfer from over 25 source systems. Migrate between Exchange servers, DMS, Enterprise Vault, Mimosa, EMC archive systems and others. We offer 100% migration outcome with shortcuts and easy control of the whole process. As a result you will become one of our satisfied customers. Let our experts handle your migration!
Why is contentGATE the right choice for your migration?
Secure and Reliable
contentGATE provides a controlled and automated way of migrating data from your Metalogix Archive Manager. There is no data loss or inconsistency due to software or human errors, nor any downtime during the migration process; contentGATE collects all info about your migrated emails into a report. It migrates your whole MAM archive and replaces MAM shortcuts with original emails.
Fast and Effective
contentGATE provides a scalable way of migrating multiple mailboxes at the same time. In case of corrupted emails, incomplete content, disconnection from MAM or other errors that may occur during the migration, contentGATE provides a great categorization mechanism. It repeats only the migration of failed items. contentGATE prevents your target system from duplications of your already migrated emails. There is no more unnecessary waste of your storage.
Smart and Easy
You can easily connect to Metalogix Archive Manager (MAM) using contentGATE’s native MAM connector. contentGATE reads the meta-data from the MAM database and connects to HSM Store, accessing the archived emails. Now, you are just a few quick steps away from finishing your Metalogix Archive Manager migration. This approach overcomes MAM’s bottleneck by accessing the archive indirectly. Everything runs automatic, controlled and safe.
Successful migration step by step
Using contentGATE, you can perform the migration from Metalogix Archive Manager Exchange Edition (MAM) to Microsoft 365 (Microsoft 365) in simple steps. The easy creation of the migration project and its configuration, with absolutely controllable and scalable migration, will save you time and money. You get maximum security and a consistent data transfer.
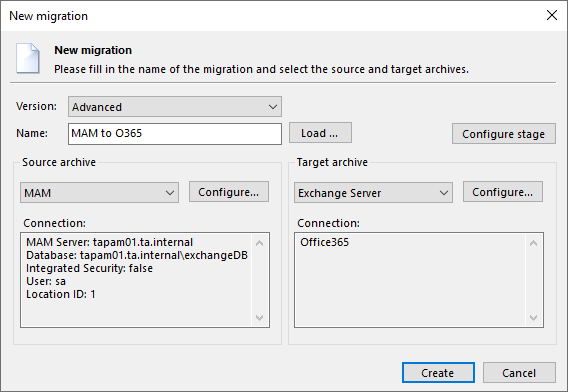
1. Creation of your migration
To create a migration project, you must define a connection to your Metalogix Archive Manager as the source and at the same time to your Microsoft 365 mandant as the target. The MAM connection configuration contains the direct connection to the MAM database and the MAM server.
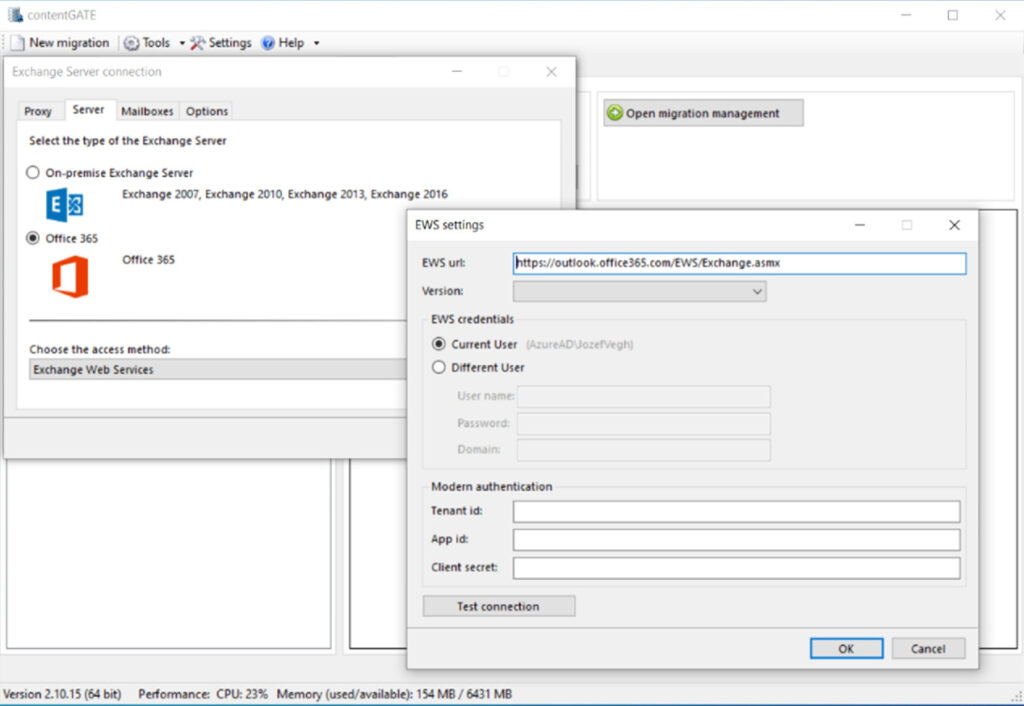
2. Configuration of O365 connection
The connection to your Microsoft 365 mandant is configured via Exchange Web Services (EWS) and PowerShell. The login to Microsoft 365 can be performed either via OAuth or Modern Authentication.
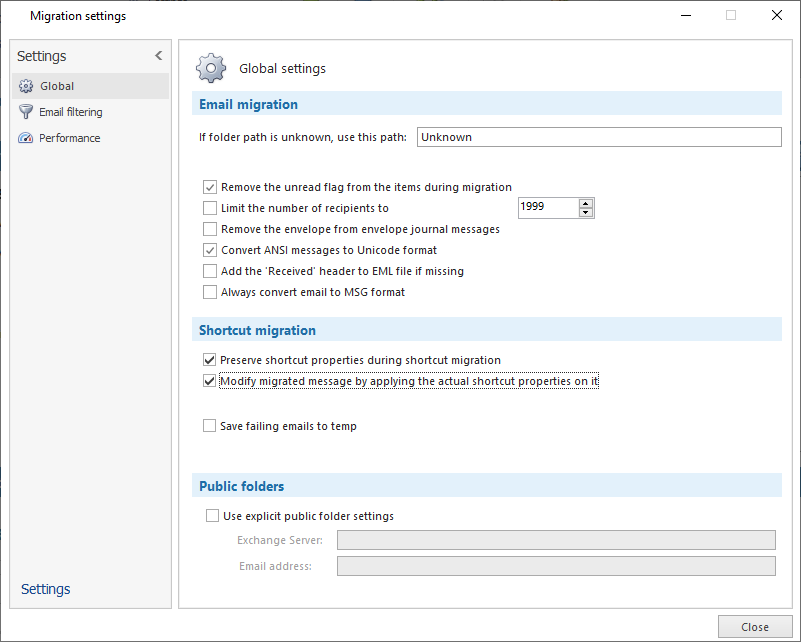
3. Migration settings
Migration settings offer many options. For example, in Global Settings you can specify a target mailbox folder for mailbox items whose path cannot be found during the migration process. Filter settings allow you to exclude certain mailboxes from the migration process. Performance settings allow you to set the default performance values for each migration job.
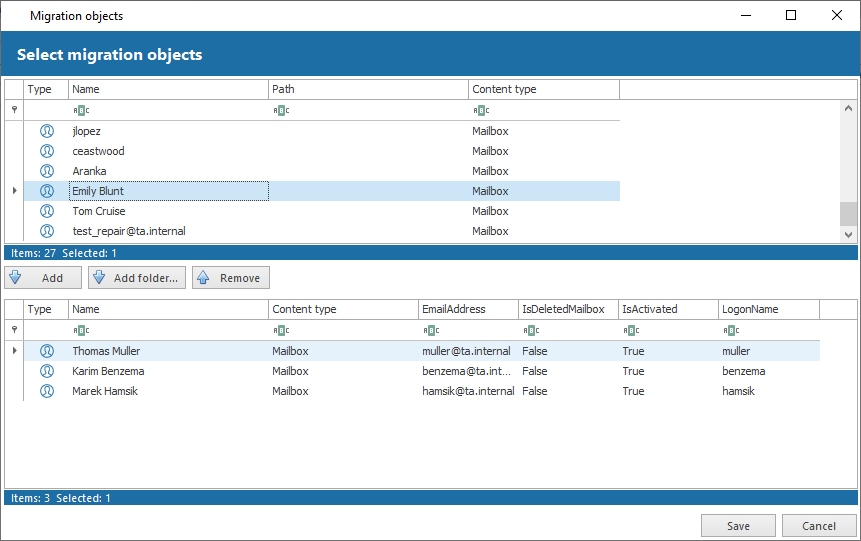
4. Loading source objects
When loading source objects, you have two options how to load source mailboxes:
– Load All (this option is used to load all objects available in the source archive)
– Select manually (to load only desired objects)
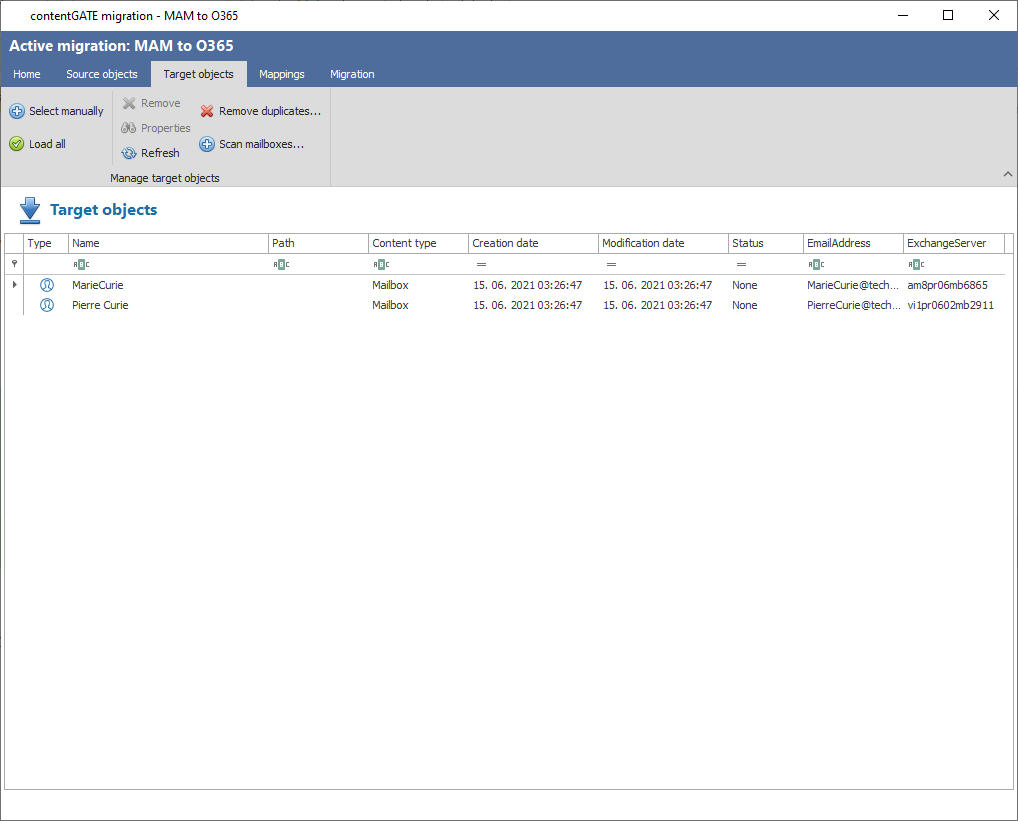
5. Loading target objects
When loading target objects, you can directly upload Microsoft 365 mailboxes as the target system. The process is the same as for source objects. Simply load the desired objects into the target list and switch to the “Mappings” section.
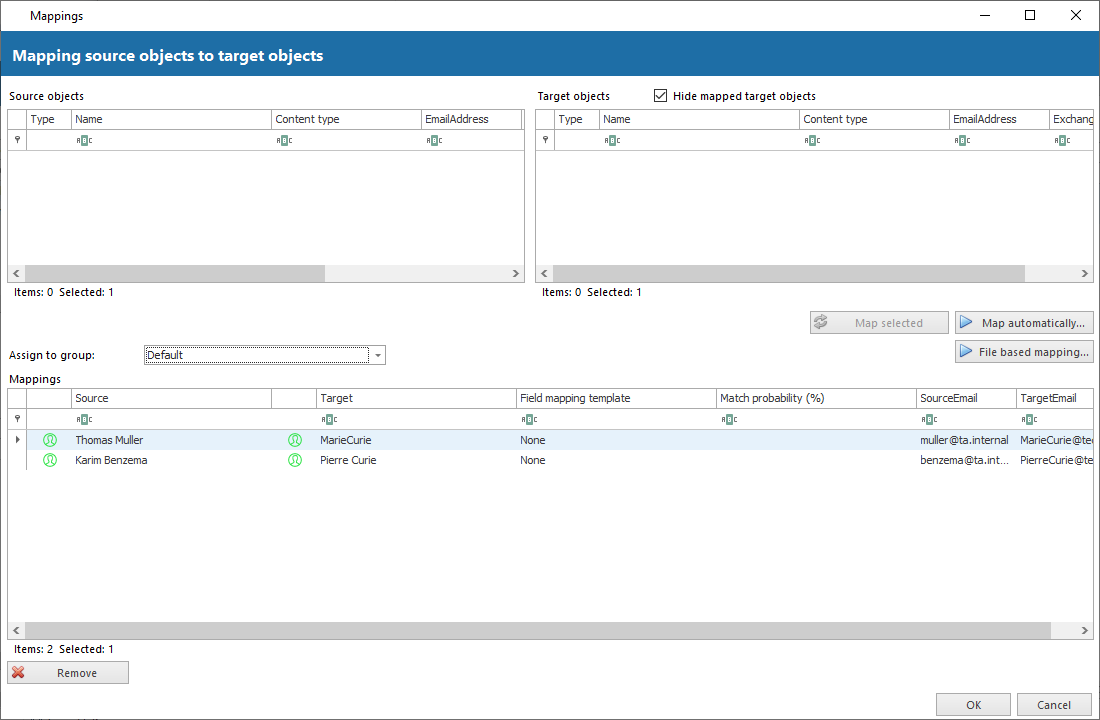
6. Mappings
Mappings can be specified manually or automatically. For example, you can select these mapping criteria:
– Match the name
– Match email address
– Match identifier – based on IDs contained in object properties
– Match email address with prefix
– Match target name with login
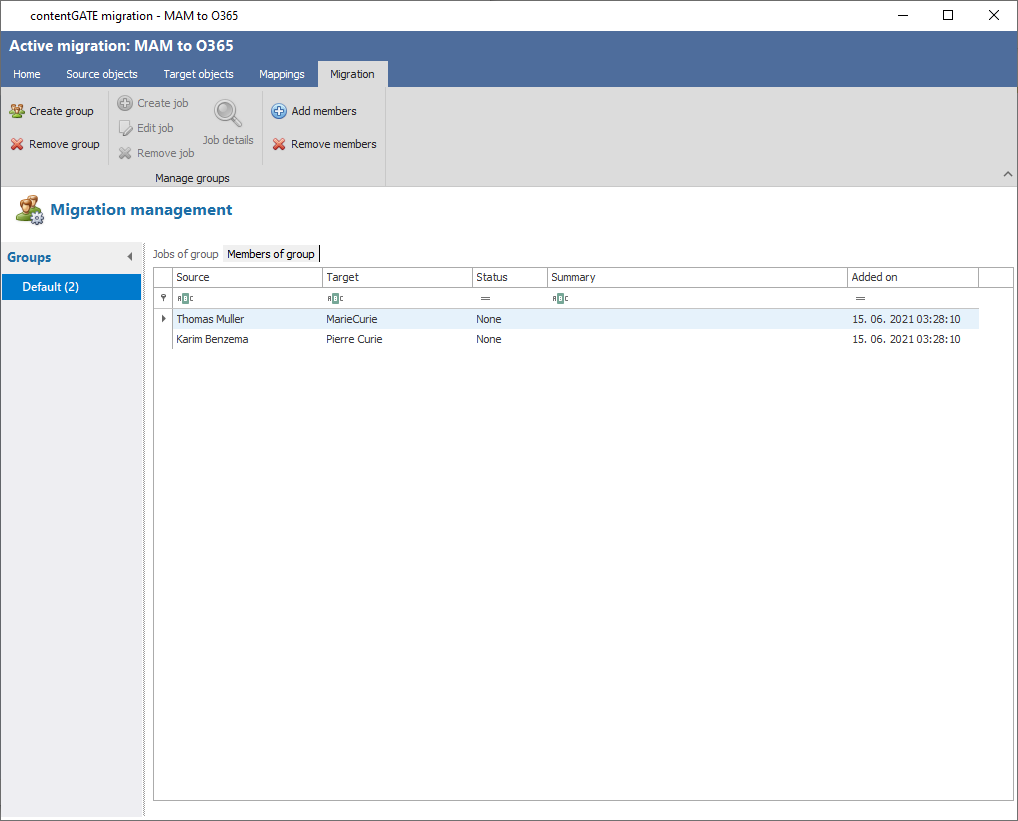
7. Group management
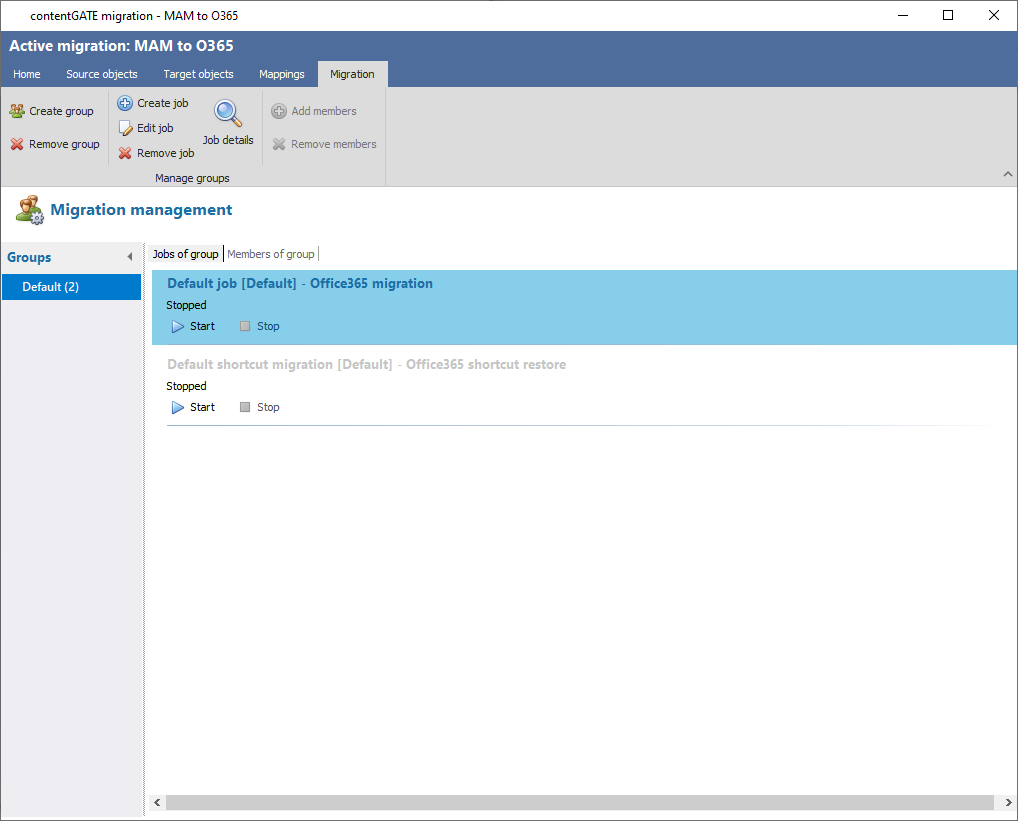
Migration can be started only at a group level. Group management makes the migration process more transparent and clearer. It makes it easier to check, which mailboxes have already been migrated and helps to prioritize important mailboxes.
8. Start your migration job
You can start your migration from the job grid on the migration page. Migration job can be stopped or paused from this grid. You can always restart the migration process after being stopped and continue with it from the last migration point.
9. Job details
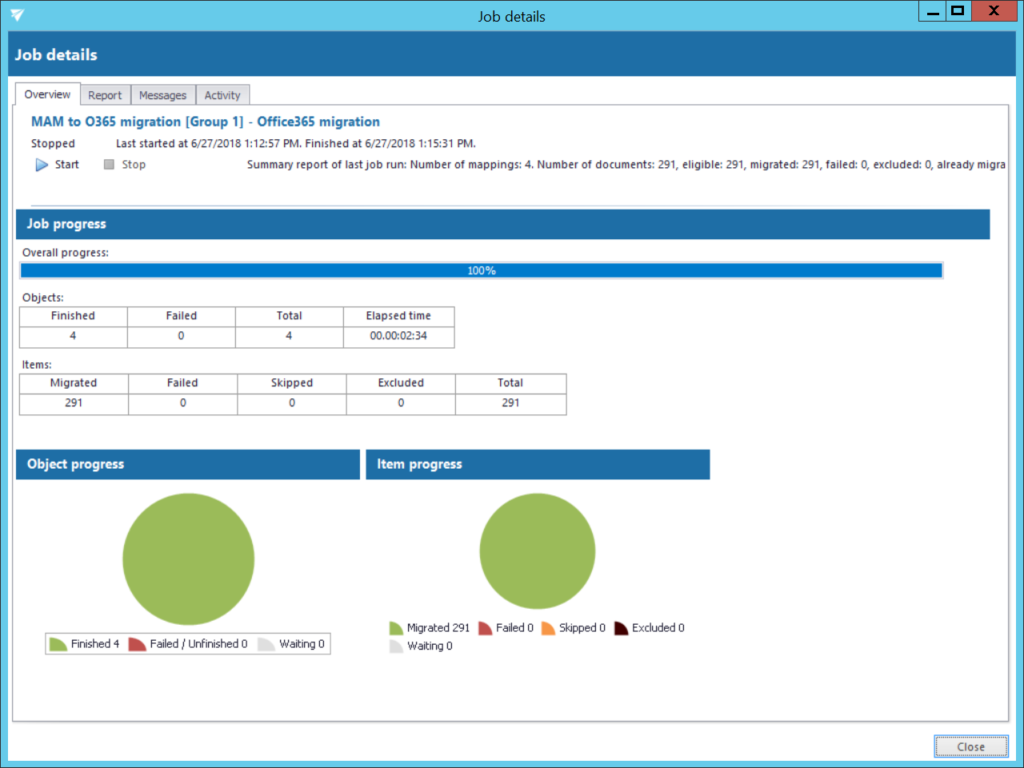
Details about the last performance of an individual job can be viewed in your job details. If the job is currently running, the current status is displayed. You can view the status as an overview, report, or as a more detailed info tab.
10. Migration report
When your migration is complete, you can easily create a report and evaluate the result.
There are two report types:
– full migration report (contains the status, item migration details, shortcut migration details)
– report for assigned objects (contains specific information about the migration object, migration status and details)
Do you have further questions or any job for us? Contact us..
Q&A
-
What does the licensing price depend on?
The migration licensing is based on the uncompressed data volume transferred via contentGATE into Microsoft 365. -
How much time does the migration take?
Time of the migration depends on these specifications:
a. Performance of the old MAM environment – Store, Database and VMs performance,
b. Where are we migrating to – Exchange is usually the bottle neck,
c. Even the internet connection can play a role (connected to client’s location),
d. Performance of the new (target) environment
The best way to determine the migration speed is through a test migration / POC – prove of concept phase of the project.
-
What migration possibilities do I have?
To migrate your data first, then shortcuts:
In this strategy, the data are migrated in the background. User accesses the data from the former archive until the new archive is switched to production. The shortcuts are migrated as soon as the switch is done. After that, the user can use all his new applications to access his archive. Conclusion:
a. all data available, full-text search is ready (depending on target system),
b. no time pressure,
c. no risk of losing access to data.
To migrate shortcuts first, then data:
This strategy is useful if the new archive needs to be used immediately and the user wants to migrate emails that are already archived but still present in his mailboxes. The shortcut migration ensures that the active (live) data in mailboxes are migrated first. Emails or shortcuts, which are not active (live) in mailboxes, are migrated during the data migration. The emails that are already migrated through the shortcut migration are skipped during the data migration and no duplicates are created. Conclusion:
a) The user can immediately use the new archive; live data are available in short time,
b) More time is needed until the full archive is built (inactive data).
It is also possible to apply different strategies for different users.
-
Can I run multiple migrations at the same time? Will I create duplicates if I run the migration multiple times?
Yes, you can run multiple migrations at the same time, also from different sources - PST and MAM for example. contentGATE keeps a record of already migrated items, therefore no items are migrated twice. -
Can I prioritize / select what users will be migrated at which point?
Migration is group-based, and the migration group can contain any selected users. You can prioritize users by adding them to a migration group and starting their migration ahead of others.
-
Can I migrate deleted / inactive users?
Yes, the inactive users can be migrated to the new target system /archive. The inactive users can also be exported to PST files, the folder structure will be kept. -
How can I check if all the data has been successfully migrated?
At the end of every migration, a migration report can be generated and compared with the prior generated archive size report. You can also run search queries within your report to find a proof of every migrated item. -
How can I check my license usage?
In contentGATE, there is an option to check the “License usage information” that will provide you with the exact license usage info.

